I have to admit, reclaiming clay used to feel like a major chore, and I’d often end up tossing it out. Not my proudest moment, but it was the reality.
It didn’t take long for me to realize that throwing away clay was like tossing money in the trash. So, I decided it was time to turn things around and start reclaiming my scraps.
I began with a two-bucket system: all my slops, trimmings, and scrap clay went into a top 5-gallon bucket, stacked on another 5-gallon bucket. The idea was that water would drain from the top bucket into the bottom one, leaving clay that was ready to be reclaimed.It wasn’t a walk in the park! When I finished, I often ended up with nearly 5 gallons of clay to process, which required a lot of space and time—two things I was always short on.
So, I set out to find a better way that would make the process quicker and more enjoyable. Here’s the new system that’s been working wonders for me:
- Keep It Small: I only reclaim using a one gallon bucket...this part is key to keeping it manageable.
- Consistency of the Clay: I let the clay dry out completely until it's bone dry.
- Add Water: When my bucket is about two-thirds full of bone-dry clay, I cover it with water (I use hot water because, in my mind, it speeds things up).
- Blend Away: After 24 hours, I break out the immersion blender and mix the clay until it’s smooth.
- Remove Extra Water: If there's excess water on top, I sponge it off.
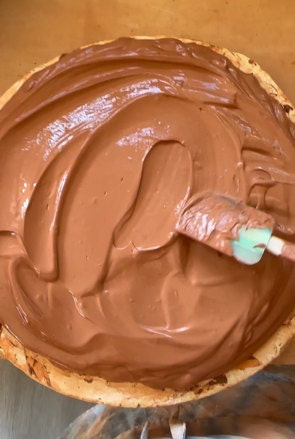
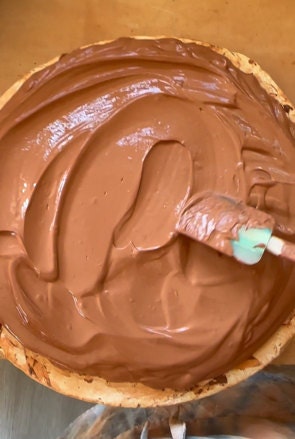
- Smooth and Set: Once the clay is blended to a pudding-like consistency, I pour it onto a *plaster bat and spread it out as evenly as I can.
- Dry Time: I wait until the edges start to lift before flipping it over to continue drying.
- Final Touches: Once the clay is firm enough to be wedged, I start the wedging process. If it’s still too wet in the middle, I flatten it out and let it dry some more, checking frequently to ensure an even moisture level.
Reclaiming clay doesn’t have to be a hassle—it can actually be a lot of fun! I’ve found joy in the process, and now it takes just 30 minutes from start to finish (plus a 24-hour wait for clay to soak and then the WAITING for it to dry enough to wedge). Happy reclaiming!
*No plaster bat? No problem! You can use a towel over a piece of plywood or hardibacker instead.

